
Technical Guide to Press Characterization, Dot Gain Control, Color Management and Print Optimization
1.Introduction
Fingerprinting is a systematic press characterization and prepress calibration procedure used to evaluate the performance of a specific combination of flexographic printing press, photopolymer plate, mounting tape, anilox roller, ink system and printing substrate.
The objective is to establish a reliable technical baseline of the printing process under controlled production conditions. The results help prepress teams develop appropriate screening parameters, tone-value correction curves, color-management settings and production standards.
In simple terms: Fingerprinting identifies how the press actually prints, so that the artwork, plates and printing conditions can be optimized to achieve the intended result.
2.Why Is Fingerprinting Necessary?
2.1 Dot Gain and Tonal Value Control
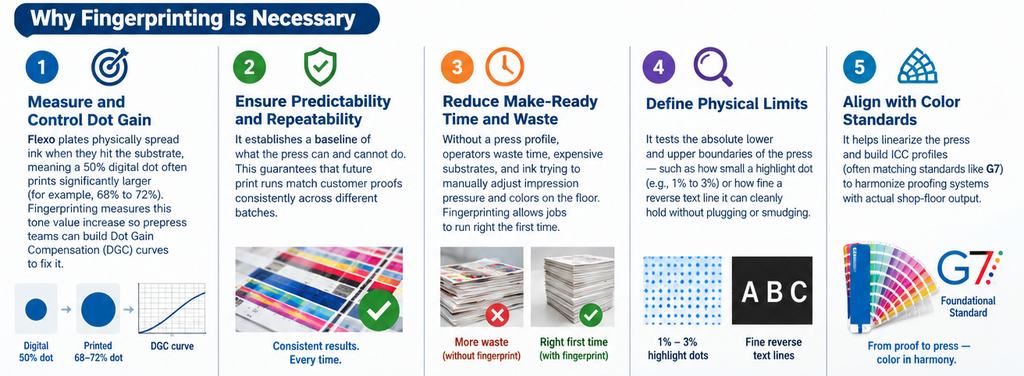
In flexographic printing, printed dots can become larger than their intended digital dimensions because of plate deformation, impression pressure, ink transfer, substrate characteristics and other process variables.
For example, a nominal 50% digital tone may reproduce at 68–72% on a particular press configuration. This is an illustrative example, not a universal benchmark.
Fingerprinting measures tone-value increase (TVI) across the tonal range and provides the data needed to develop appropriate dot gain compensation (DGC) curves.
Technical benefits:
§More accurate highlight, midtone and shadow reproduction.
§Improved contrast and detail retention.
§Better control of tonal transitions and image appearance.
§Reduced variation between the digital artwork and printed result.
2.2 Print Consistency and Repeatability
Fingerprinting establishes documented operating conditions and a reference print standard for future production.
By recording the press settings, ink conditions, plate specifications, anilox characteristics and substrate, the production team can reproduce approved print results more consistently.
2.3 Reduced Make-Ready Time, Waste and Production Cost
Without a validated fingerprint, operators may need repeated adjustments to impression, ink delivery, viscosity, registration and color strength.
A properly conducted fingerprinting trial helps identify suitable operating conditions before commercial production, reducing avoidable trial-and-error, substrate waste, ink consumption and machine downtime.
2.4 Definition of Reproduction Limits
Fingerprinting determines the practical capabilities and limitations of the printing system.
The test form should evaluate:
§Minimum reproducible highlight dots.
§Maximum shadow dot retention and open-area reproduction.
§Fine positive and reverse text.
§Thin lines, fine details and small symbols.
§Smooth gradients and tonal transitions.
§Screen ruling and screening technology compatibility.
§Ink bridging, plugging, pinholing and other print defects.
§
The achievable limits depend on the plate, imaging system, press, anilox, ink, substrate and operating conditions. They should be established through actual press trials rather than assumed in advance.
2.5 Color Management and Standardization
Fingerprinting provides the baseline data required for press calibration and subsequent color characterization.
Depending on the objective, the workflow may include:
§Tone-value correction and press linearization.
§Solid ink density or colorimetric measurements.
§CIELAB color evaluation and Delta E analysis.
§ICC profile creation or refinement.
§G7 calibration and verification, where appropriate.
Fingerprinting alone does not guarantee compliance with an ICC, G7 or other color standard. The relevant calibration, characterization and verification procedures must also be completed.
3. Critical Parameters to Standardize During Fingerprinting
A. Photopolymer Plates and Mounting
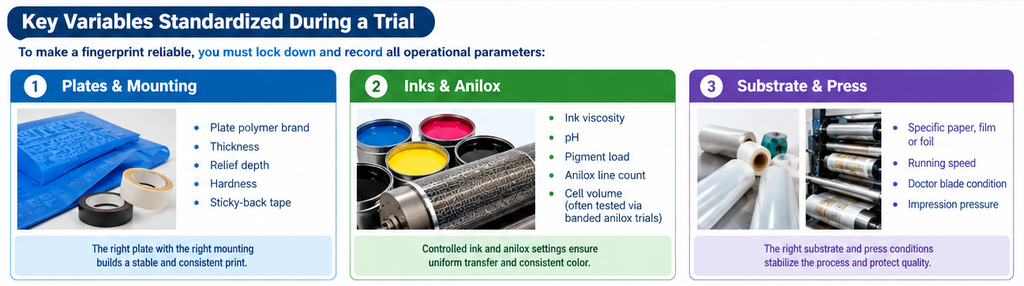
§Plate manufacturer, type and thickness.
§Plate hardness, relief depth and surface characteristics.
§Imaging resolution and screening technology.
§Mounting tape type, thickness and compressibility.
§Plate mounting accuracy and cylinder condition.
B. Anilox Roller and Ink Delivery
§Anilox line count, expressed in L/cm or LPI.
§Anilox cell volume, expressed in cm³/m² or BCM.
§Cell geometry, condition and cleanliness.
§Doctor blade condition and chamber settings.
§Ink viscosity, pH where applicable, temperature and color strength.
§Ink formulation and substrate compatibility.
Where practical, banded anilox trials can help identify the most suitable combination of line count and cell volume for the application.
C. Printing Press and Substrate
§Press type, configuration and running speed.
§Impression settings and plate-to-substrate contact.
§Substrate type, surface treatment and printability.
§Web tension, registration and drying conditions.
§Environmental conditions where relevant.
§Repeatable operating settings for each color station.
4. Recommended Fingerprinting Test Form
A comprehensive test form should contain:
1.Tonal scales: 0–100% patches, with sufficient increments to characterize highlights, midtones and shadows.
●
2.Dot reproduction targets: Highlight dots, midtone patterns and shadow details.
3.Solid patches: Cyan, magenta, yellow, black and relevant spot colors.
●
4.Overprint patches: Two-color and multicolor combinations for evaluating trapping and color interaction.
●
5.Fine-detail targets: Positive and reverse text, thin lines and small graphic elements.
●
6.Screening targets: Different screen rulings, angles and screening technologies where applicable.
●
7.Colorimetric targets: Measurement patches suitable for the intended color-management workflow.
●
8.Process-control elements: Registration marks, slur targets, uniformity checks and other relevant diagnostic features.
●
5. Recommended Implementation Workflow
Step 1 — Prepare: Inspect the press, plates, mounting tape, anilox rollers, ink system and substrate.
Step 2 — Standardize: Establish stable press settings and document all relevant parameters.
Step 3 — Print the test form: Run the fingerprinting target under representative production conditions.
Step 4 — Measure and analyze: Evaluate tonal values, dot gain, solid color, color difference, registration, detail reproduction and defects.
Step 5 — Optimize prepress: Apply validated compensation curves, screening settings and color-management adjustments.
Step 6 — Verify: Print a confirmation target and compare the results against the agreed acceptance criteria.
Step 7 — Document and maintain: Save the fingerprint data and approved operating window. Revalidate whenever significant process changes occur.
6. Expected Business and Technical Benefits
§More predictable and repeatable print quality.
§Improved tonal balance and image sharpness.
§Better control of color variation.
§More efficient prepress preparation and make-ready.
§Lower material waste and fewer production adjustments.
§Improved communication between prepress, production and quality-control teams.
§Greater confidence when introducing new substrates, plates, anilox specifications or screening technologies.
Conclusion
Fingerprinting is not merely a test print; it is a foundation for data-driven flexographic process control. When properly executed and documented, it enables the printing team to understand the capabilities of its equipment, establish realistic reproduction limits, optimize prepress settings and achieve more consistent, commercially acceptable print quality.
The objective is simple: Measure the process, optimize the parameters, validate the results and reproduce the approved quality consistently.